# 使用 Jupyter Notebook
🏷 sec_jupyter
本节介绍如何使用 Jupyter Notebook 编辑和运行本书各章中的代码。确保你已按照 :ref: chap_installation 中的说明安装了 Jupyter 并下载了代码。如果你想了解更多关于 Jupyter 的信息,请参阅其文档中的优秀教程。
# 在本地编辑和运行代码
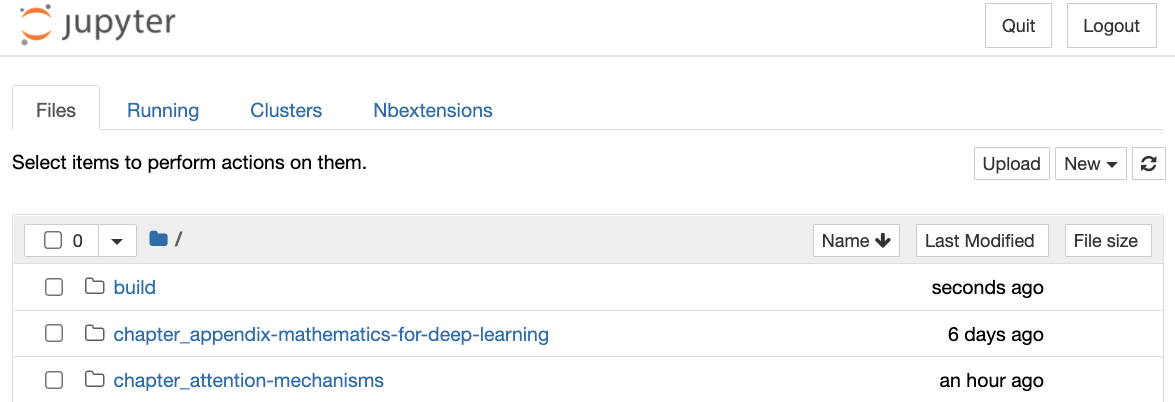
假设本书代码的本地路径为 xx/yy/d2l-en/ 。使用 shell 将目录更改为此路径( cd xx/yy/d2l-en )并运行命令 jupyter notebook 。如果浏览器未自动打开,请打开 http://localhost:8888。此时你将看到 Jupyter 的界面以及包含本书代码的所有文件夹,如 :numref: fig_jupyter00 所示
:width: 600px
🏷 fig_jupyter00
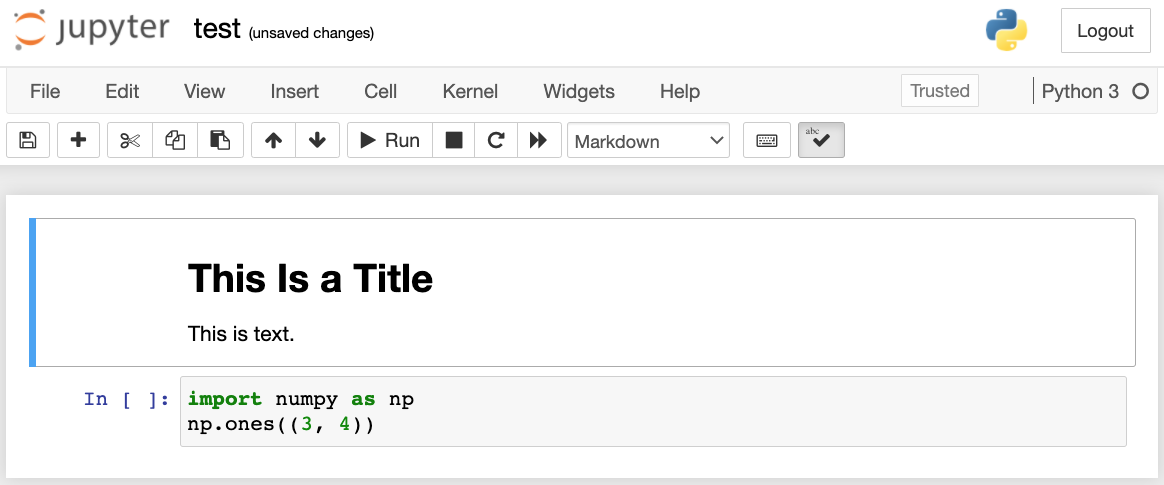
你可以通过单击网页上显示的文件夹来访问 notebook 文件。它们通常有后缀 “.md”。为了简洁起见,我们创建了一个临时的 “test.md” 文件。单击后显示的内容如 :numref: fig_jupyter01 所示。此 notebook 包括一个标记单元格和一个代码单元格。标记单元格中的内容包括 “This Is a Title” 和 “This is text.”。代码单元包含两行 Python 代码。
:width: 600px
🏷 fig_jupyter01
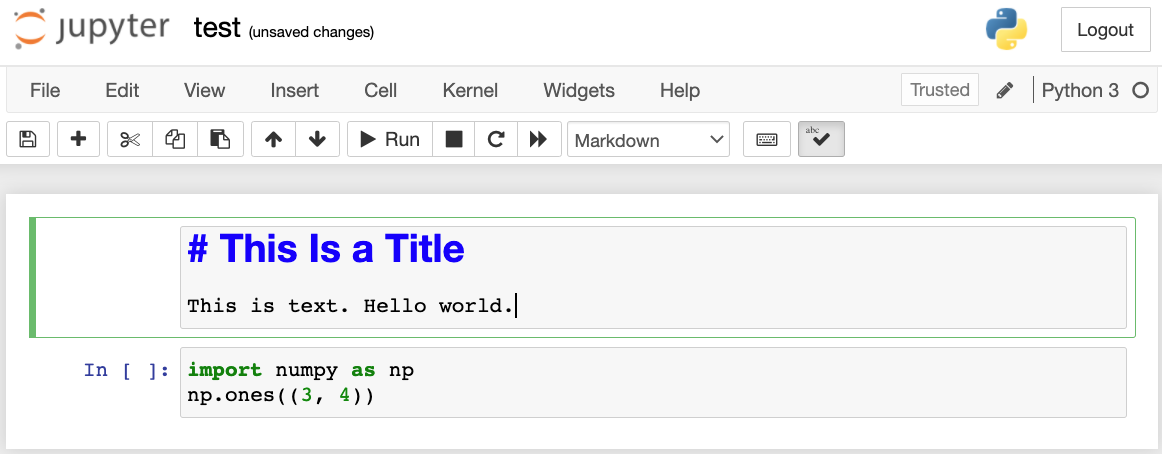
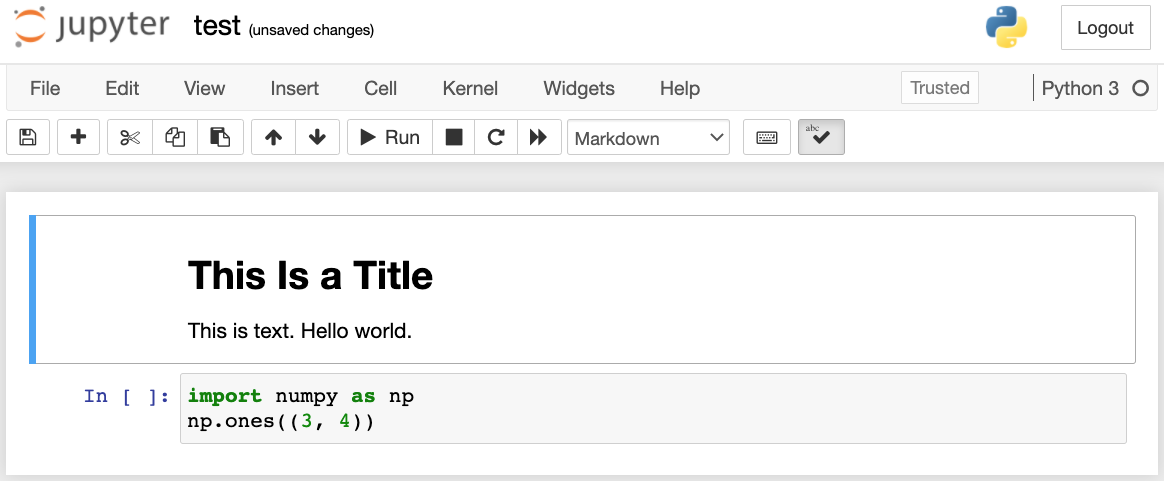
双击标记单元格以进入编辑模式。在单元格末尾添加一个新的文本字符串 “Hello world.”,如 :numref: fig_jupyter02 所示。
:width: 600px
🏷 fig_jupyter02
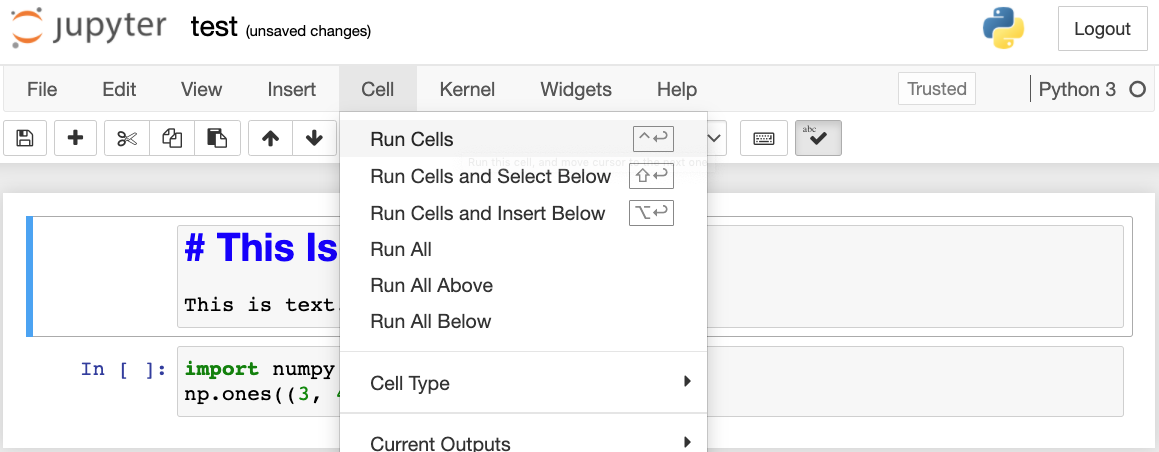
如 :numref: fig_jupyter03 所示,单击菜单栏中的 “Cell” “Run Cells” 以运行编辑后的单元格。
:width: 600px
🏷 fig_jupyter03
运行后,markdown 单元格如 :numref: fig_jupyter04 所示。
:width: 600px
🏷 fig_jupyter04
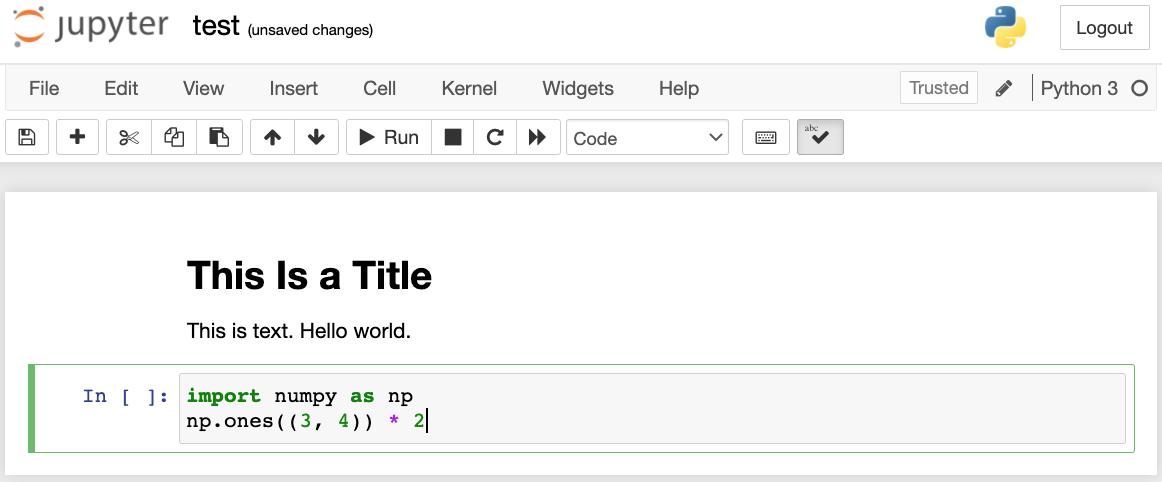
接下来,单击代码单元。将最后一行代码后的元素乘以 2,如 :numref: fig_jupyter05 所示。
:width: 600px
🏷 fig_jupyter05
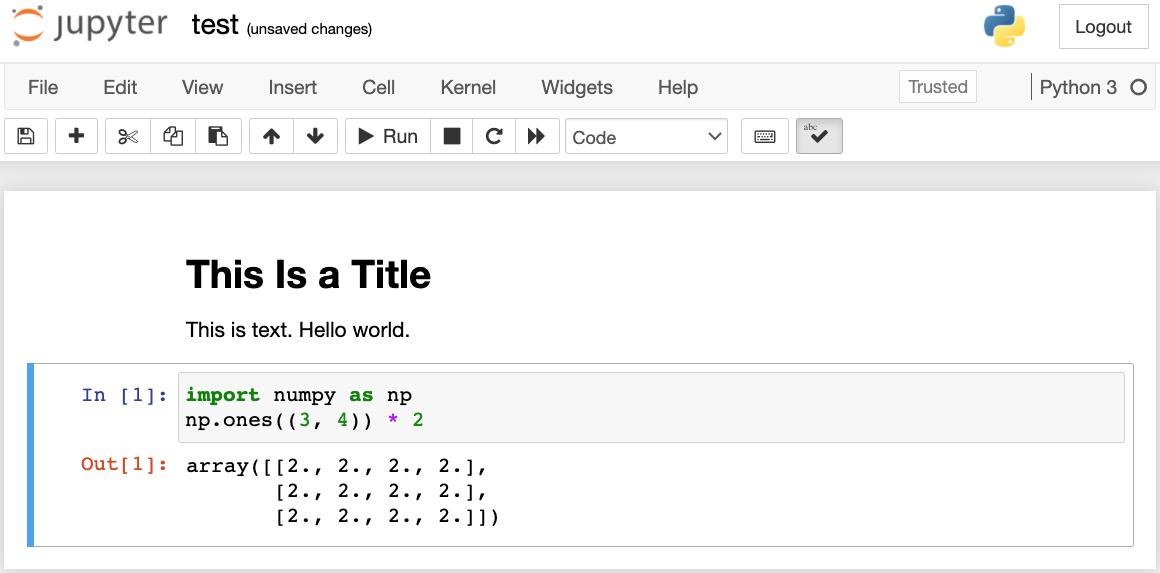
你还可以使用快捷键(默认情况下为 Ctrl+Enter)运行单元格,并从 :numref: fig_jupyter06 获取输出结果。
:width: 600px
🏷 fig_jupyter06
当一个 notebook 包含更多单元格时,我们可以单击菜单栏中的 “Kernel”“Restart & Run All” 来运行整个 notebook 中的所有单元格。通过单击菜单栏中的 “Help” “Edit Keyboard Shortcuts”,可以根据你的首选项编辑快捷键。
# 高级选项
除了本地编辑,还有两件事非常重要:以 markdown 格式编辑 notebook 和远程运行 Jupyter。当我们想要在更快的服务器上运行代码时,后者很重要。前者很重要,因为 Jupyter 原生的 ipynb 格式存储了大量辅助数据,这些数据实际上并不特定于 notebook 中的内容,主要与代码的运行方式和运行位置有关。这让 git 感到困惑,并且使得合并贡献非常困难。幸运的是,还有另一种选择 —— 在 markdown 中进行本地编辑。
# Jupyter 中的 Markdown 文件
如果你希望对本书的内容有所贡献,则需要在 GitHub 上修改源文件(md 文件,而不是 ipynb 文件)。使用 notedown 插件,我们可以直接在 Jupyter 中修改 md 格式的 notebook。
首先,安装 notedown 插件,运行 Jupyter Notebook 并加载插件:
pip install d2l-notedown  # 你可能需要卸载原始notedown
jupyter notebook --NotebookApp.contents_manager_class='notedown.NotedownContentsManager'
要在运行 Jupyter Notebook 时默认打开 notedown 插件,请执行以下操作:首先,生成一个 Jupyter Notebook 配置文件(如果已经生成了,可以跳过此步骤)。
jupyter notebook --generate-config
然后,在 Jupyter Notebook 配置文件的末尾添加以下行(对于 Linux/macOS,通常位于 ~/.jupyter/jupyter_notebook_config.py ):
c.NotebookApp.contents_manager_class = 'notedown.NotedownContentsManager'
在这之后,你只需要运行 jupyter notebook 命令就可以默认打开 notedown 插件。
# 在远程服务器上运行 Jupyter Notebook
有时,你可能希望在远程服务器上运行 Jupyter Notebook,并通过本地计算机上的浏览器访问它。如果本地计算机上安装了 Linux 或 MacOS(Windows 也可以通过 PuTTY 等第三方软件支持此功能),则可以使用端口转发:
ssh myserver -L 8888:localhost:8888
以上是远程服务器 myserver 的地址。然后我们可以使用 http://localhost:8888 访问运行 Jupyter Notebook 的远程服务器 myserver 。下一节将详细介绍如何在 AWS 实例上运行 Jupyter Notebook。
# 执行时间
我们可以使用 ExecuteTime 插件来计算 Jupyter Notebook 中每个代码单元的执行时间。使用以下命令安装插件:
pip install jupyter_contrib_nbextensions
jupyter contrib nbextension install --user
jupyter nbextension enable execute_time/ExecuteTime
# 小结
- 使用 Jupyter Notebook 工具,我们可以编辑、运行和为本书做贡献。
- 使用端口转发在远程服务器上运行 Jupyter Notebook。
# 练习
- 在本地计算机上使用 Jupyter Notebook 编辑并运行本书中的代码。
- 使用 Jupyter Notebook 通过端口转发来远程编辑和运行本书中的代码。
- 对于两个方矩阵,测量 与 在 中的运行时间。哪一个更快?
Discussions