# websocket django
今日概要:
- websocket & 聊天室的案例。
- websocket & gojs & 审批流的案例
- django 核心的组件
# websocket 相关
请帮助我实现一个系统:20 个用户同时打开网站,呈现出来的就是群聊。
- 我,你好
- 张坤
- 付乐乐
- 贾文龙
- ..
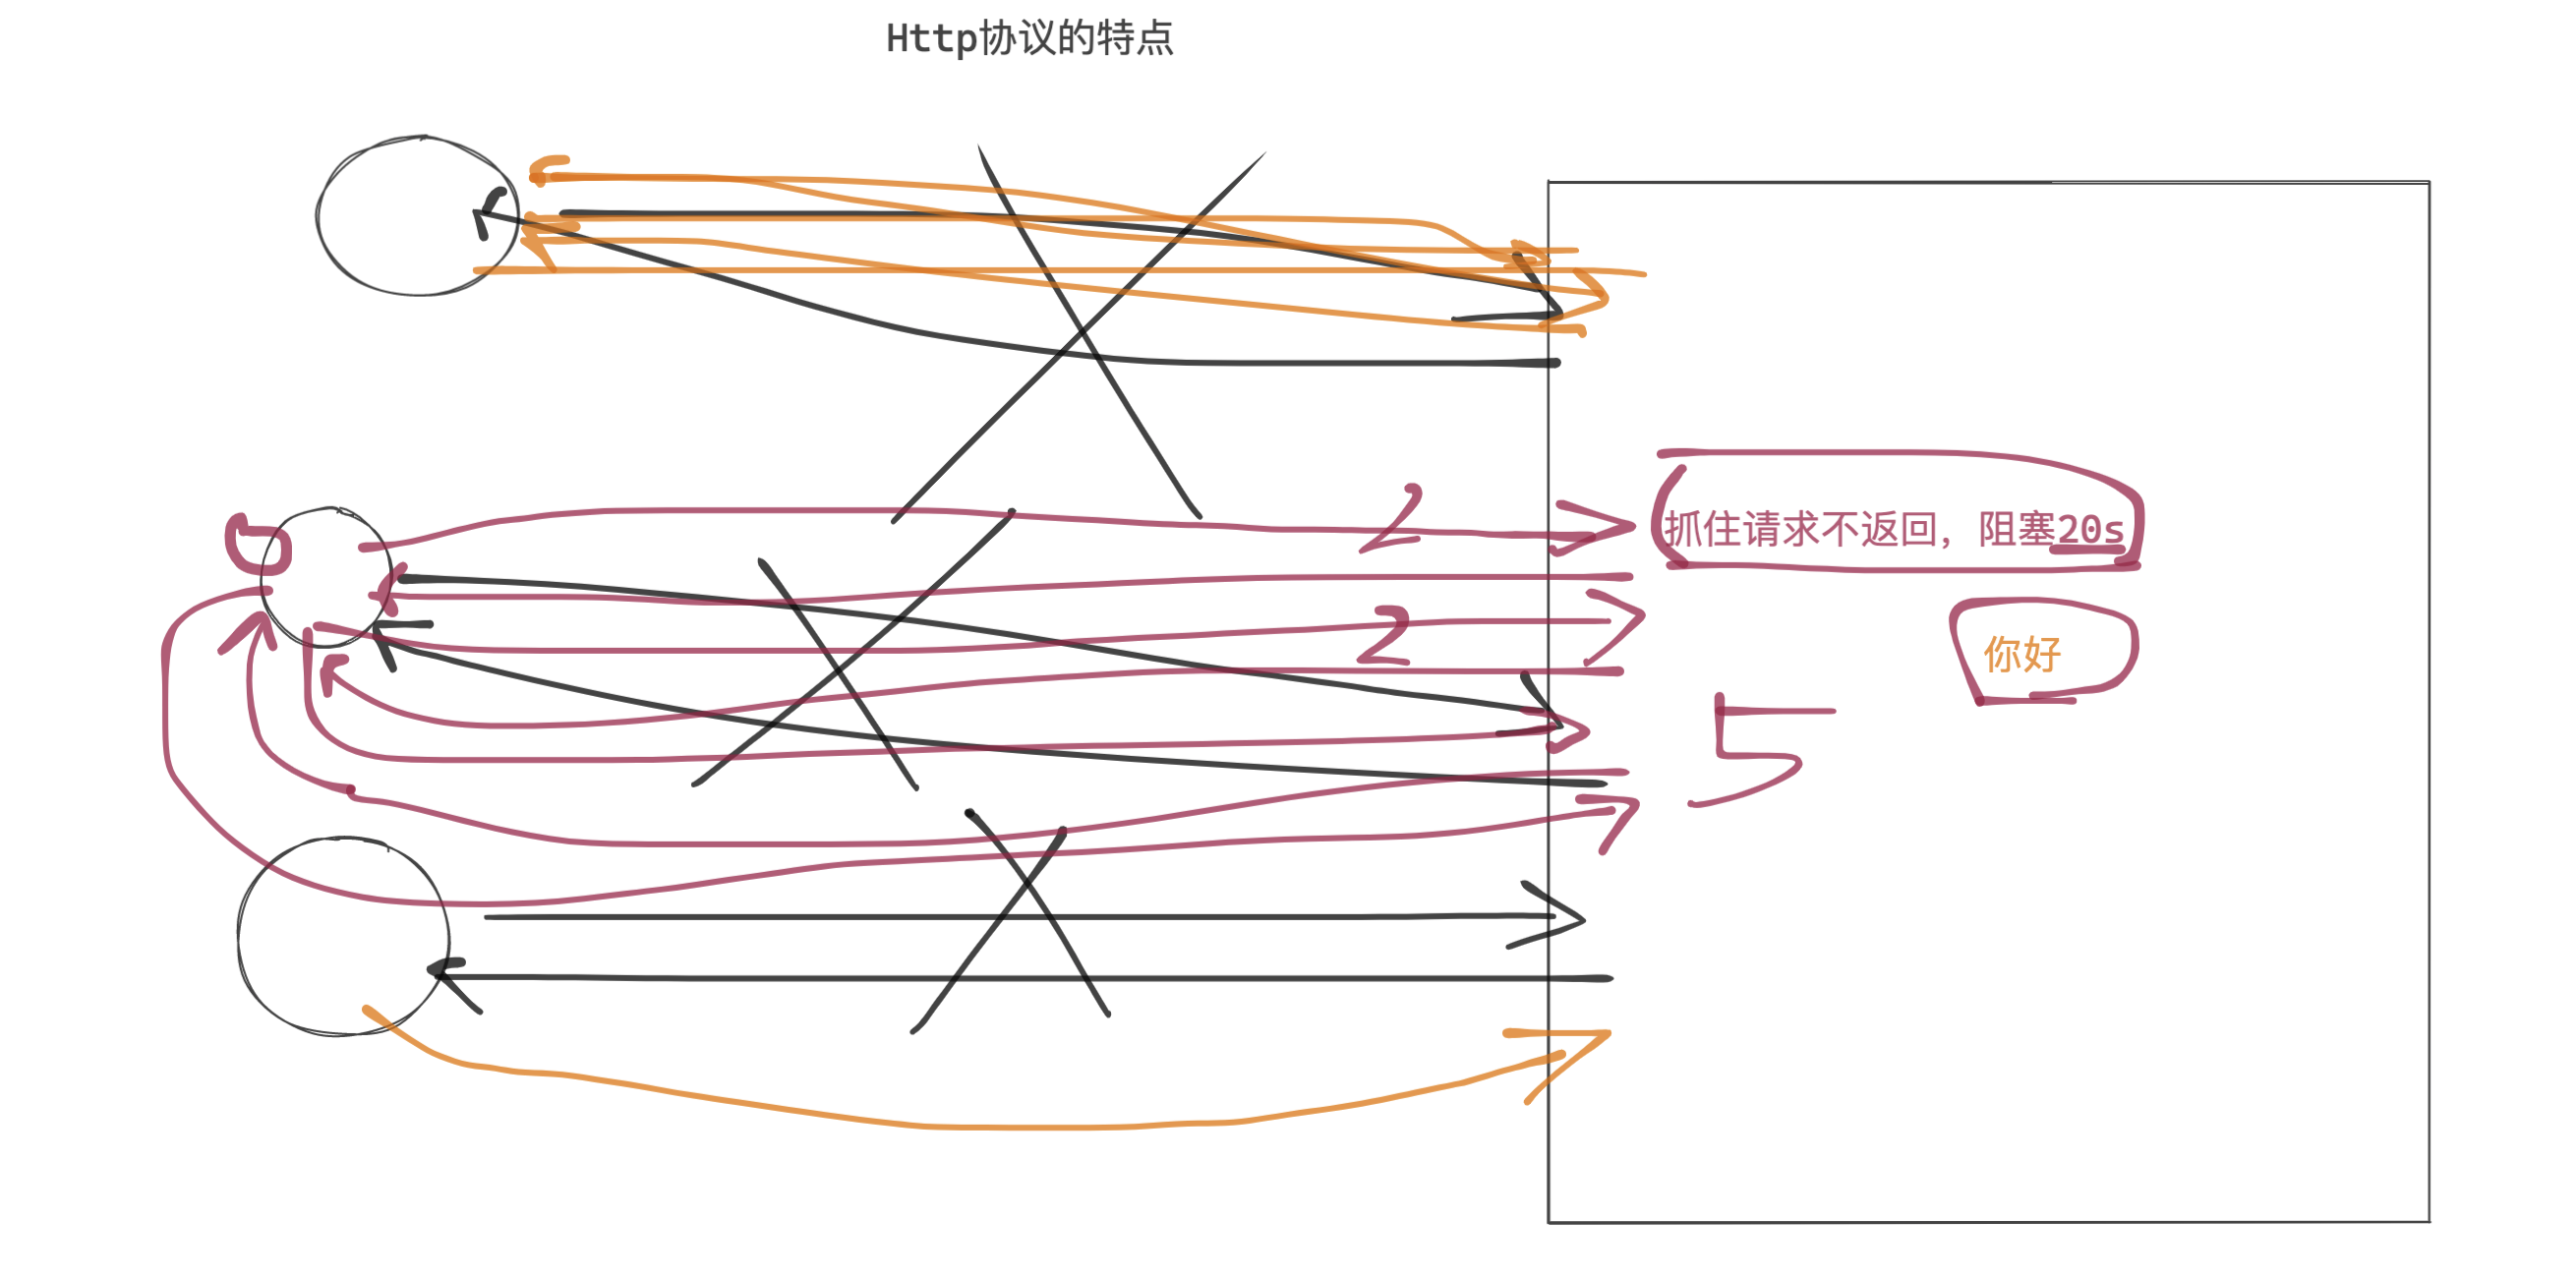
# 轮询
- 访问 /home/ 显示的聊天室界面。
- 点击发送内容,数据也可以发送到后台。
- 定时获取消息,然后再界面上展示。
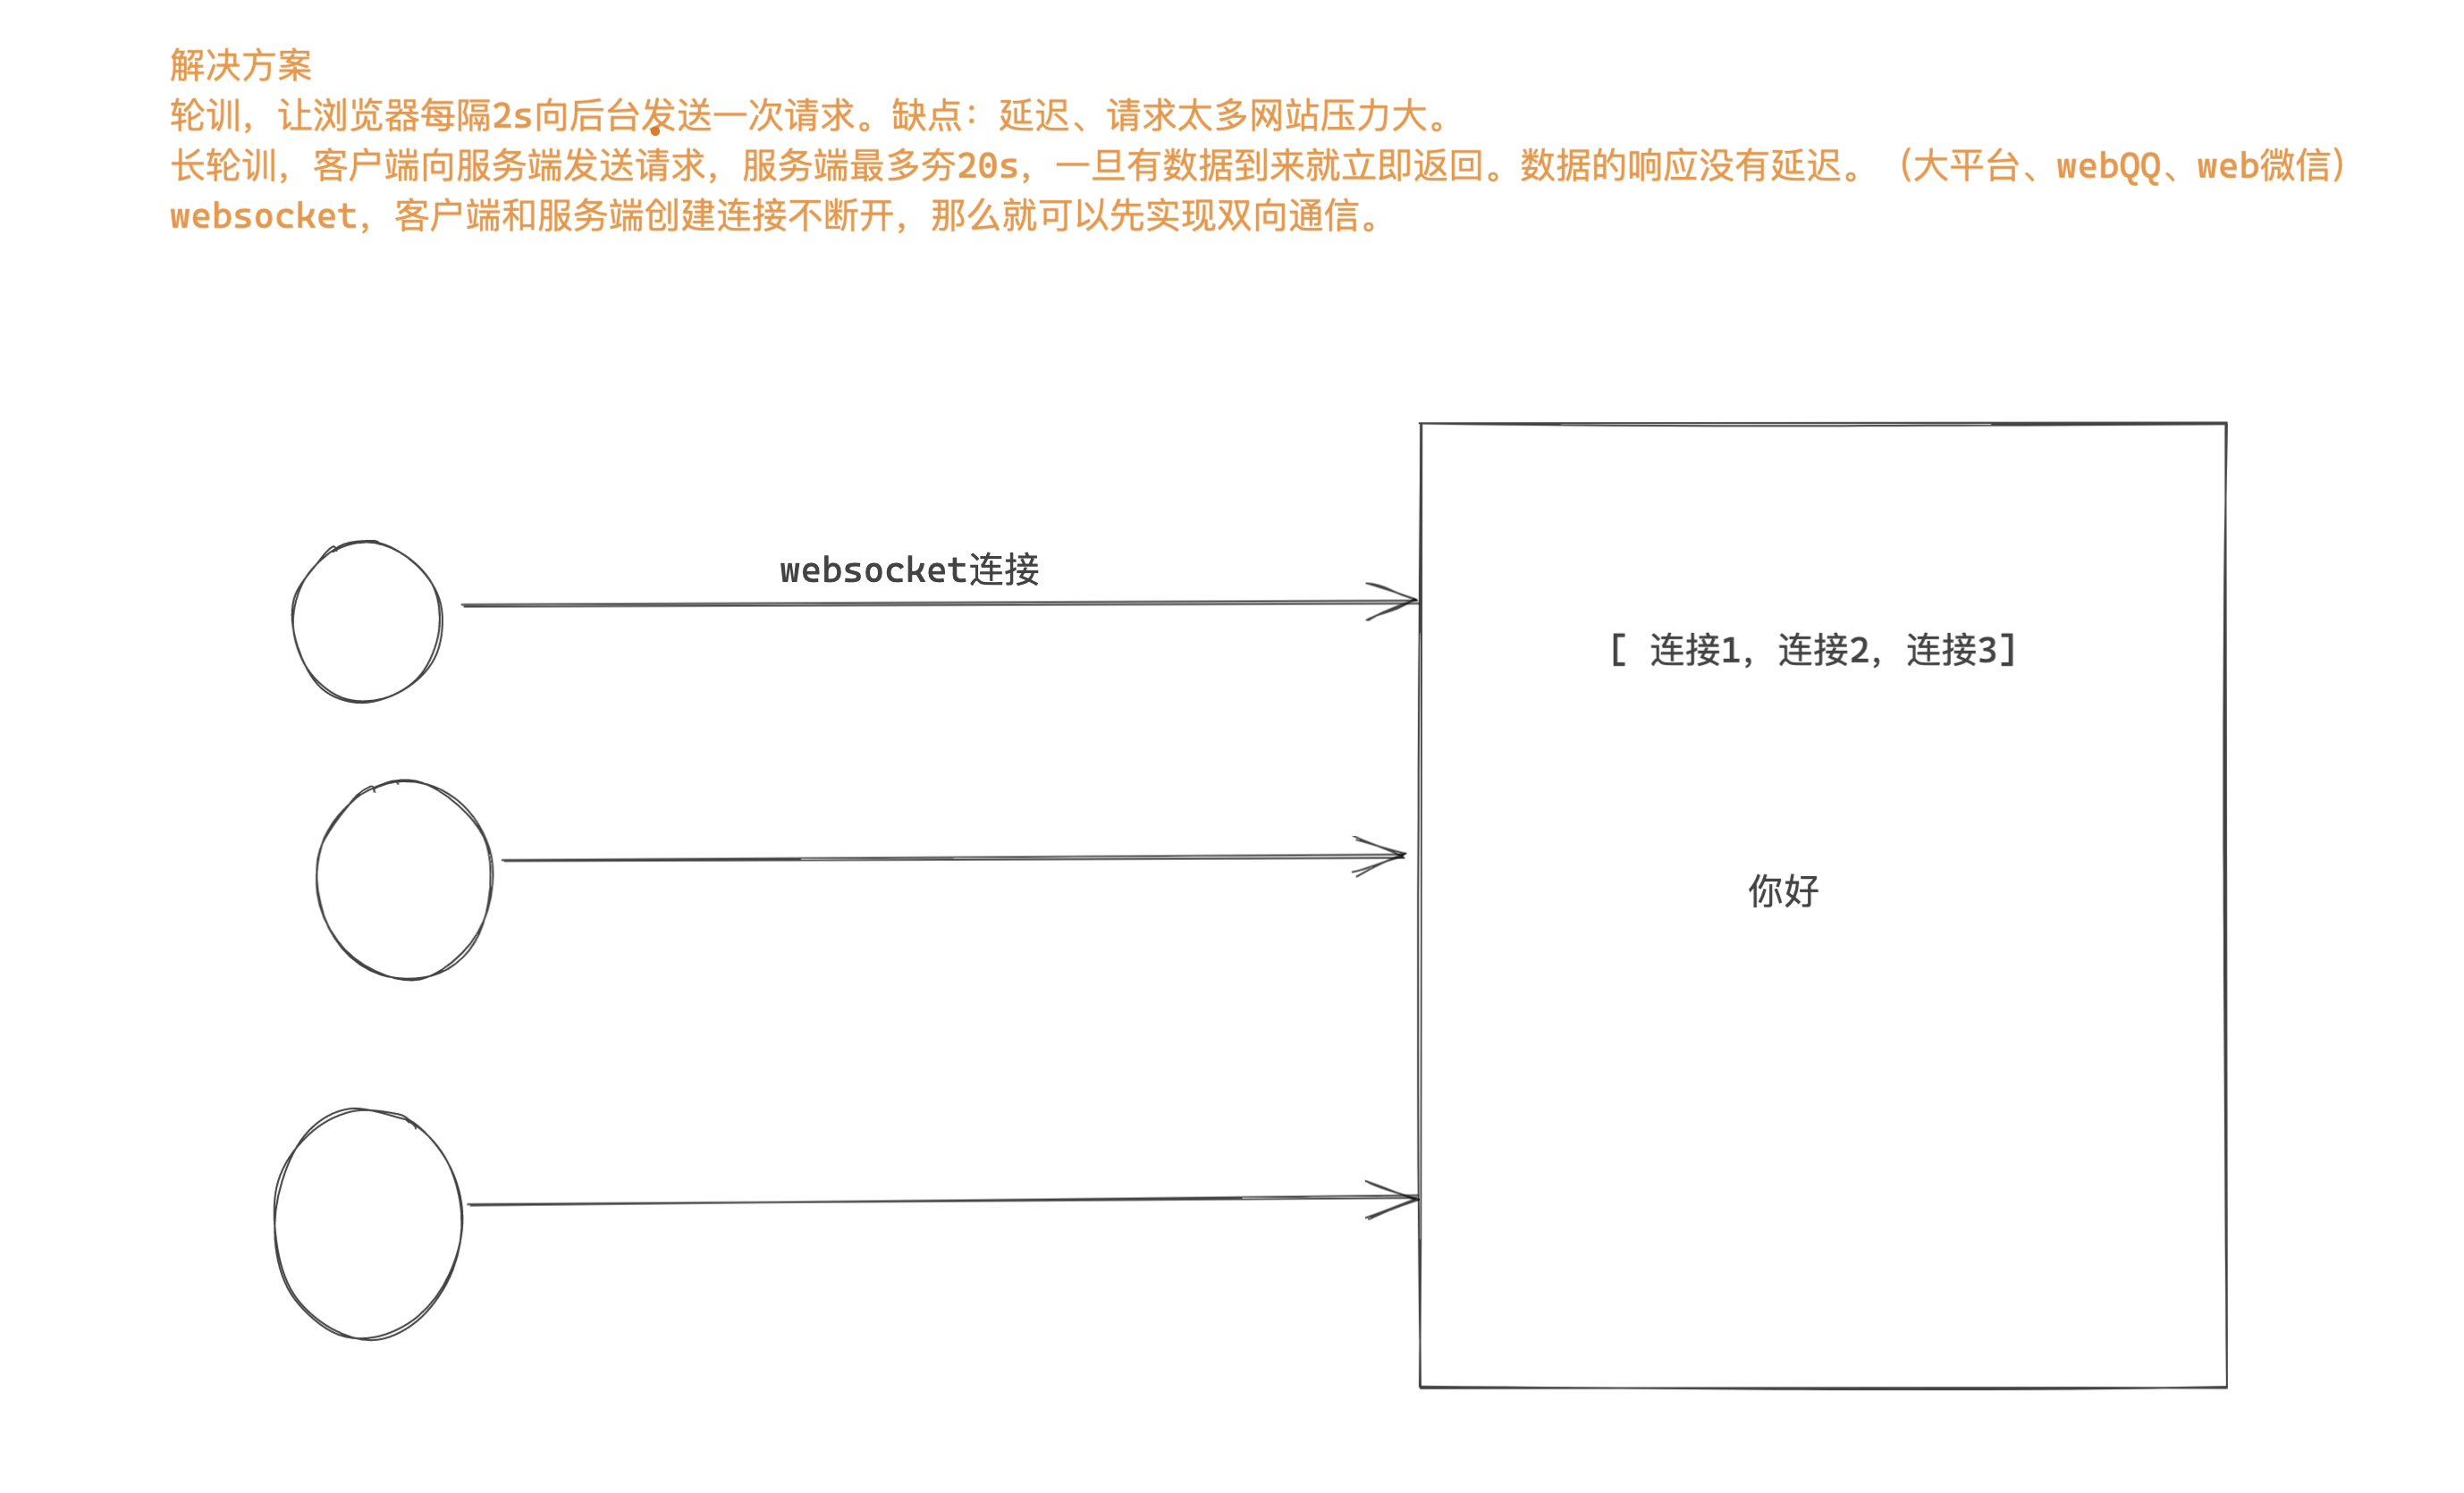
# 长轮询
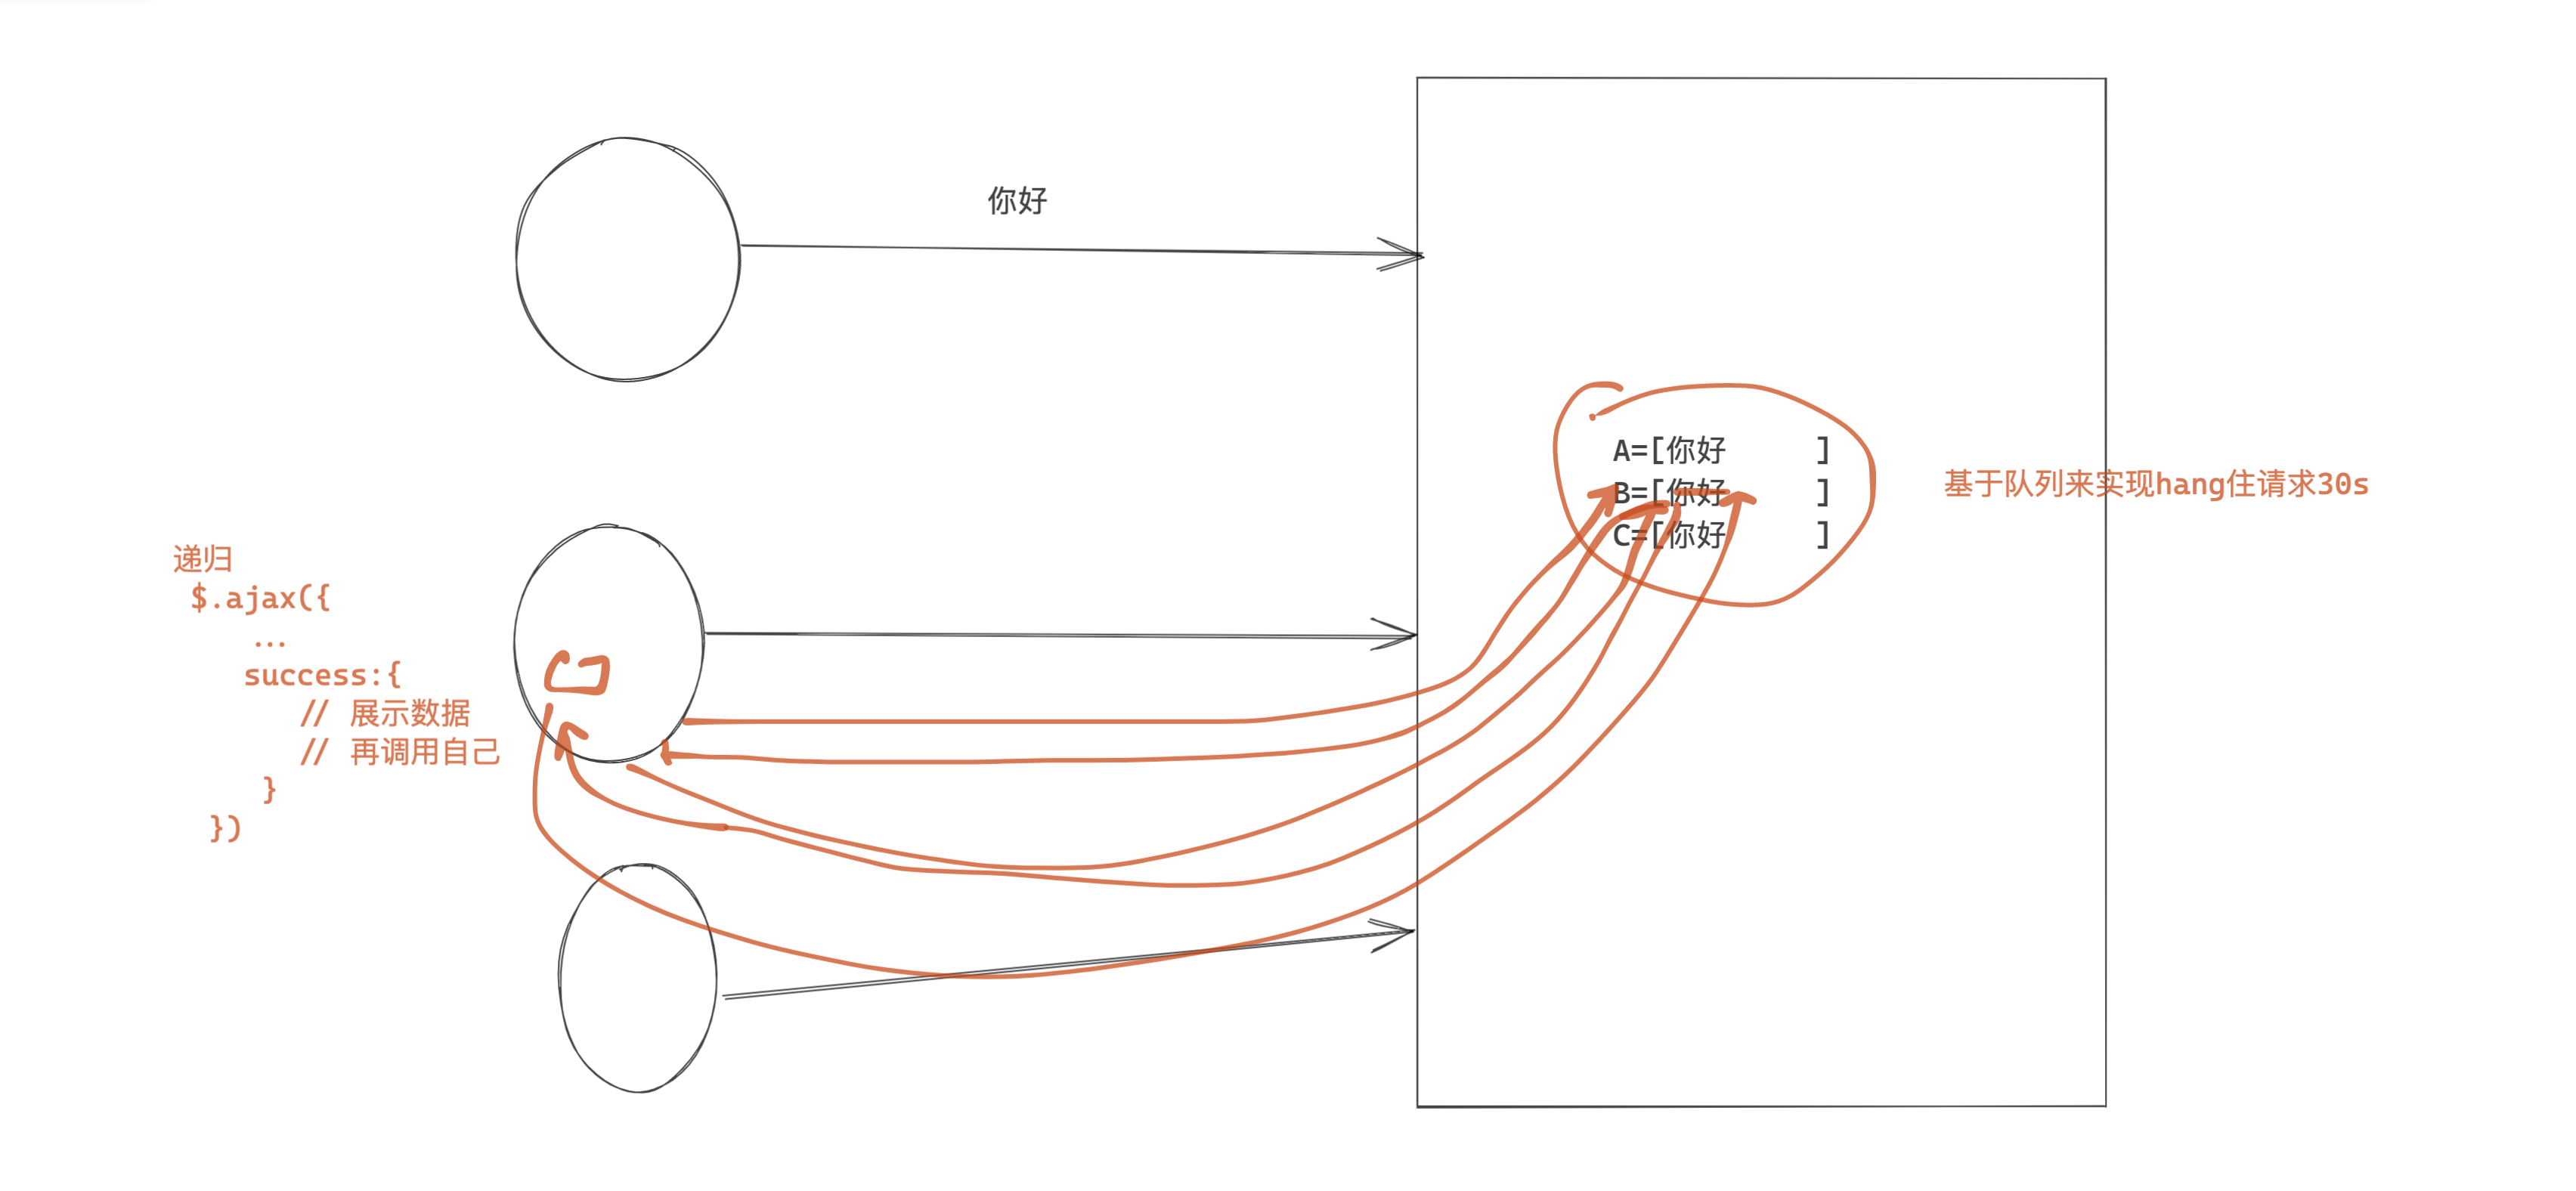
- 访问 /home/ 显示的聊天室界面。 + 每个用户创建一个队列。
- 点击发送内容,数据也可以发送到后台。+ 扔到每个人的队列中
- 递归获取消息,去自己的队列中获取数据, 然后再界面上展示。
问题:
服务端持有这个连接,压力是否会很大?
如果即基于IO多复用 + 异步。100 线程,同时 100 个用户的请求。(15 分钟)
为什么一个用户一个队列。
示例:每个用户一个队列。
队列   A
队列	 B
队列	 C
redis 发布和订阅
              					A,1
发消息           [1]  			  B,1
              				    C,1
# websocket
websocket,web 版的 socket。
原来 Web 中:
- http 协议,无状态 & 短连接。
- 客户端主动连接服务端。
- 客户端向服务端发送消息,服务端接收到返回数据。
- 客户端接收到数据。
- 断开连接。
- https 一些 + 对数据进行加密。
我们在开发过程中想要保留一些状态信息,基于 Cookie 来做。
现在支持:
- http 协议,一次请求一次响应。
- websocket 协议,创建连持久的连接不断开,基于这个连接可以进行收发数据。【服务端向客户端主动推送消息】
- web 聊天室
- 实时图表,柱状图、饼图(Highcharts)
# WebSocket 原理
http 协议
- 连接
- 数据传输
- 断开连接
websocket 协议,是建立在 http 协议之上的。
连接,客户端发起。
握手(验证),客户端发送一个消息,后端接收到消息再做一些特殊处理并返回。 服务端支持 websocket 协议。
客户端向服务端发送
GET /chatsocket HTTP/1.1
Host: 127.0.0.1:8002
Connection: Upgrade
Pragma: no-cache
Cache-Control: no-cache
Upgrade: websocket
Origin: http://localhost:63342
Sec-WebSocket-Version: 13
Sec-WebSocket-Key: mnwFxiOlctXFN/DeMt1Amg==
Sec-WebSocket-Extensions: permessage-deflate; client_max_window_bits
...
...
\r\n\r\n
服务端接收
mnwFxiOlctXFN/DeMt1Amg== 与 magic string 进行拼接。
magic string = "258EAFA5-E914-47DA-95CA-C5AB0DC85B11"

v1 = "mnwFxiOlctXFN/DeMt1Amg==" + "258EAFA5-E914-47DA-95CA-C5AB0DC85B11"
v2 = hmac1(v1)
v3 = base64(v2)
HTTP/1.1 101 Switching Protocols Upgrade:websocket Connection: Upgrade Sec-WebSocket-Accept: 密文
收发数据(加密)
b"adasdjf;akjdfp;iujas;ldkjfpaisudflkasjd;fkjas;dkjf;aksjdf;ajksd;fjka;sdijkf"先获取第 2 个字节,8 位。 10001010
再获取第二个字节的后 7 位。 0001010 -> payload len
- =127,2 字节,8 个字节, 其他字节(4 字节 masking key + 数据)。
- =126,2 字节,2 个字节, 其他字节(4 字节 masking key + 数据)。
- <=125,2 字节, 其他字节(4 字节 masking key + 数据)。
获取 masking key,然后对数据进行解密
var DECODED = "";
for (var i = 0; i < ENCODED.length; i++) {
    DECODED[i] = ENCODED[i] ^ MASK[i % 4];
}
断开连接。
# django 框架
django 默认不支持 websocket,需要安装组件:
pip install channels
配置:
注册 channels
INSTALLED_APPS = [
'django.contrib.admin',
'django.contrib.auth',
'django.contrib.contenttypes',
'django.contrib.sessions',
'django.contrib.messages',
'django.contrib.staticfiles',
'channels',
]在 settings.py 中添加 asgi_application
ASGI_APPLICATION = "ws_demo.asgi.application"
# 上面的 ws_demo 改成自己的 django 项目的名字修改 asgi.py 文件
asgi.py 默认是只支持 http 协议的import osfrom django.core.asgi import get_asgi_application
from channels.routing import ProtocolTypeRouter, URLRouter
from . import routing
os.environ.setdefault('DJANGO_SETTINGS_MODULE', 'ws_demo.settings')
# application = get_asgi_application()application = ProtocolTypeRouter({
"http": get_asgi_application(),
"websocket": URLRouter(routing.websocket_urlpatterns),
})
在 settings.py 的同级目录创建 routing.py
from django.urls import re_path
from app01 import consumers
websocket_urlpatterns = [
re_path(r'ws/(?P<group>\w+)/$', consumers.ChatConsumer.as_asgi()),
]在 app01 目录下创建 consumers.py,编写处理 websocket 的业务逻辑。
from channels.generic.websocket import WebsocketConsumer
from channels.exceptions import StopConsumer
class ChatConsumer(WebsocketConsumer):
def websocket_connect(self, message):
# 有客户端来向后端发送 websocket 连接的请求时,自动触发。# 服务端允许和客户端创建连接。self.accept()
def websocket_receive(self, message):
# 浏览器基于 websocket 向后端发送数据,自动触发接收消息。print(message)
self.send("不要回复不要回复")
# self.close()def websocket_disconnect(self, message):
# 客户端与服务端断开连接时,自动触发。print("断开连接")
raise StopConsumer()
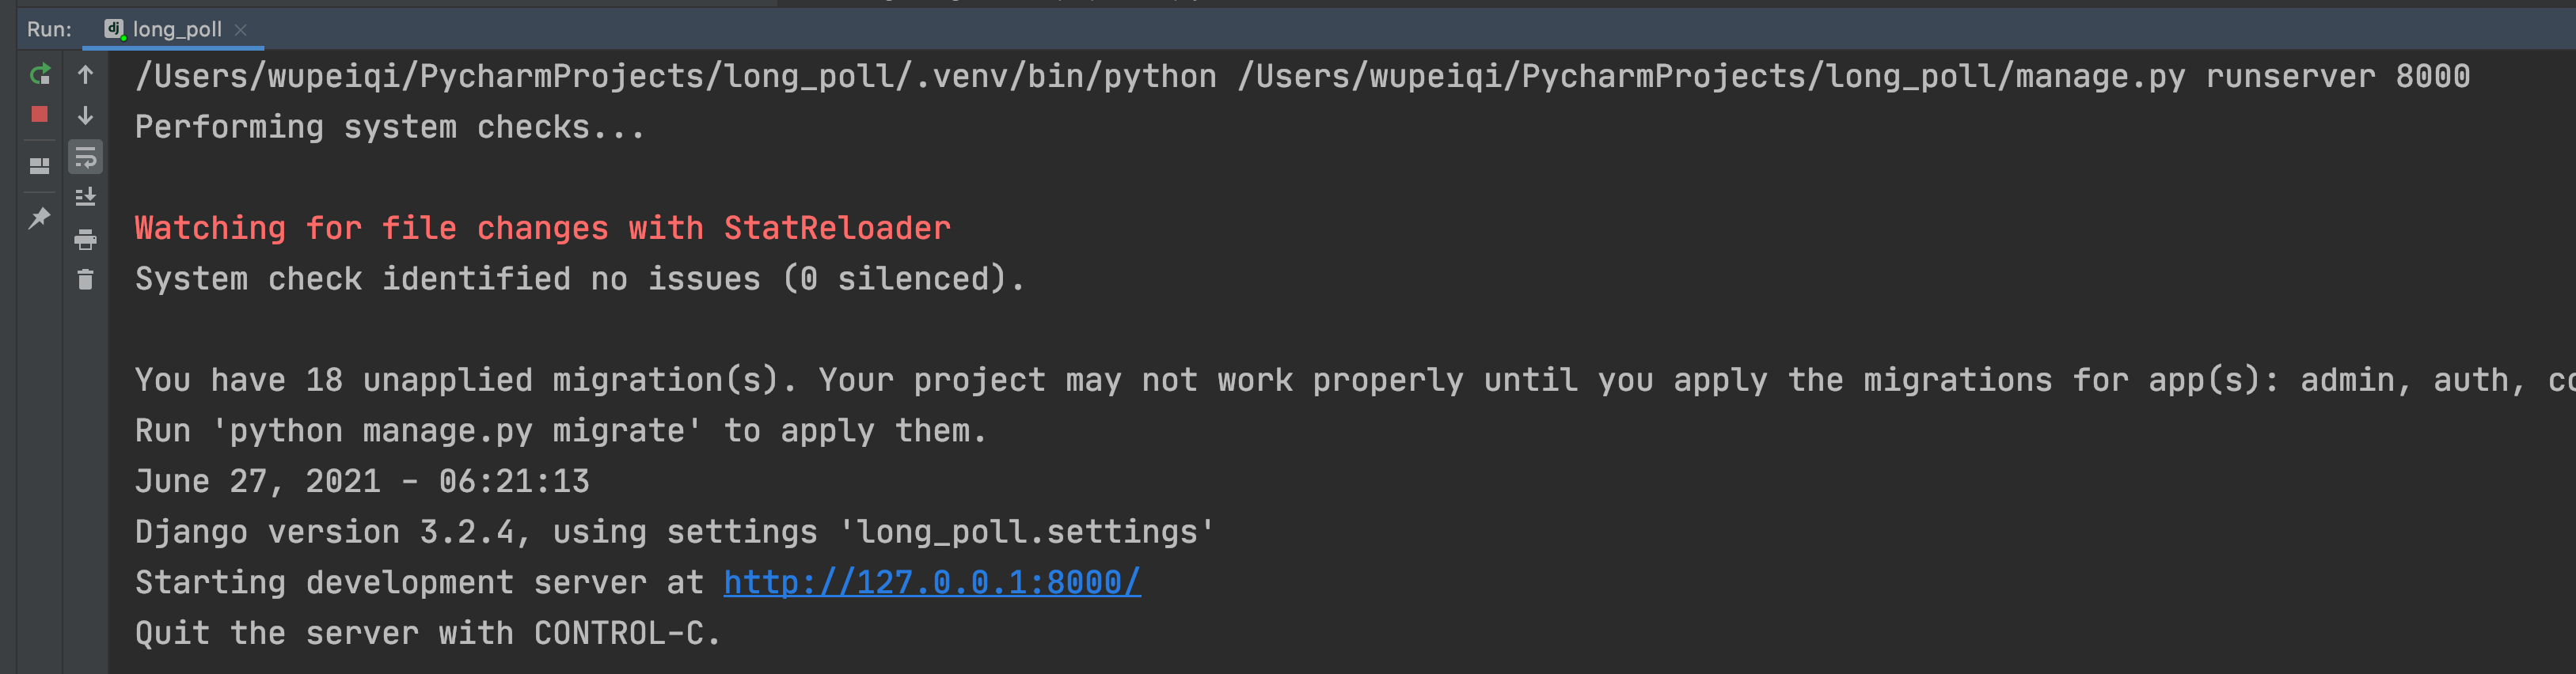
在 django 中你要了解的:
wsgi,在以前你们学习 django 时,都是用的 wsgi。
![image-20210627142144020]()
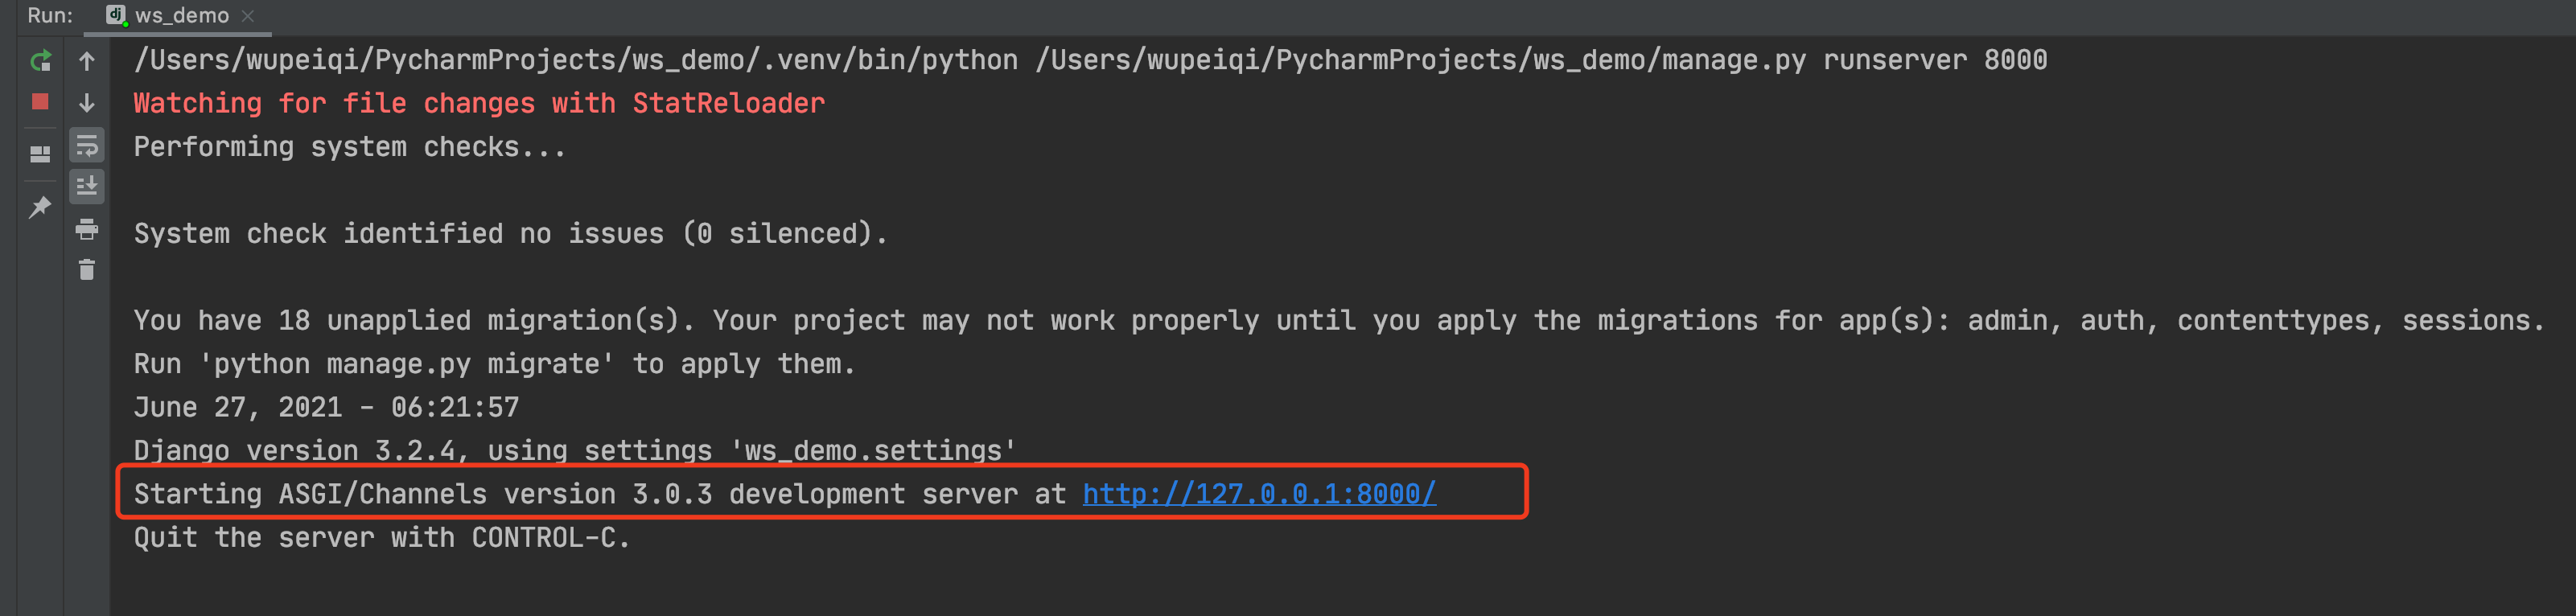
asgi,wsgi + 异步 + websocket。
![image-20210627142211955]()
http
urls.py
views.py
websocket
routings.py
consumers.py
# 聊天室
访问地址看到聊天室的页面,http 请求。
让客户端主动向服务端发起 websocket 连接,服务端接收到连接后通过(握手)。
客户端,websocket。
socket = new WebSocket("ws://127.0.0.1:8000/room/123/");服务端
from channels.generic.websocket import WebsocketConsumer
from channels.exceptions import StopConsumer
class ChatConsumer(WebsocketConsumer):
def websocket_connect(self, message):
print("有人来连接了..")
# 有客户端来向后端发送 websocket 连接的请求时,自动触发。# 服务端允许和客户端创建连接(握手)。self.accept()
收发消息(客户端向服务端发消息)
客户端
<div><input type="text" placeholder="请输入" id="txt"><input type="button" value="发送" onclick="sendMessage()"></div><script>
socket = new WebSocket("ws://127.0.0.1:8000/room/123/");
/*WebSocket 请求需要用到 WebSocket 对象,不能再浏览器上直接输入网址访问 */function sendMessage() {
let tag = document.getElementById("txt");
socket.send(tag.value);
}</script>服务端 在 consumers.py 文件
from channels.generic.websocket import WebsocketConsumer
from channels.exceptions import StopConsumer
class ChatConsumer(WebsocketConsumer):
def websocket_connect(self, message):
print("有人来连接了...")
# 有客户端来向后端发送 websocket 连接的请求时,自动触发。# 服务端允许和客户端创建连接(握手)。self.accept()
def websocket_receive(self, message):
# 浏览器基于 websocket 向后端发送数据,自动触发接收消息。text = message['text'] # {'type': 'websocket.receive', 'text': ' 阿斯蒂芬 '}
print("接收到消息-->", text)
收发消息(服务端主动发给客户端)
服务端
from channels.generic.websocket import WebsocketConsumer
from channels.exceptions import StopConsumer
class ChatConsumer(WebsocketConsumer):
def websocket_connect(self, message):
print("有人来连接了...")
# 有客户端来向后端发送 websocket 连接的请求时,自动触发。# 服务端允许和客户端创建连接(握手)。self.accept()
# 服务端给客户端发送消息self.send("来了呀客官")
客户端
<!DOCTYPE html><html lang="en"><head><meta charset="UTF-8"><title>Title</title>
<style>
.message {
height: 300px;
border: 1px solid #dddddd;
width: 100%;
}</style></head><body><div class="message" id="message"></div>
<div><input type="text" placeholder="请输入" id="txt"><input type="button" value="发送" onclick="sendMessage()"></div><script>
// http://www.baidu.com// ws://www.baidu.comsocket = new WebSocket("ws://127.0.0.1:8000/room/123/");
// 当 websocket 接收到服务端发来的消息时,自动会触发这个函数。socket.onmessage = function (event) {
console.log(event.data);
}function sendMessage() {
let tag = document.getElementById("txt");
socket.send(tag.value);
}</script></body></html>
整合在一起:
前端:
<!DOCTYPE html> | |
<html lang="en"> | |
<head> | |
<meta charset="UTF-8"> | |
<title>Title</title> | |
<style> | |
.message { | |
height: 300px; | |
border: 1px solid #dddddd; | |
width: 100%; | |
} | |
</style> | |
</head> | |
<body> | |
<div class="message" id="message"></div> | |
<div> | |
<input type="text" placeholder="请输入" id="txt"> | |
<input type="button" value="发送" onclick="sendMessage()"> | |
<input type="button" value="关闭连接" onclick="closeConn()"> | |
</div> | |
<script> | |
socket = new WebSocket("ws://127.0.0.1:8000/room/123/"); | |
// 创建好连接之后自动触发( 服务端执行 self.accept ()) | |
socket.onopen = function (event) { | |
let tag = document.createElement("div"); | |
tag.innerText = "[连接成功]"; | |
document.getElementById("message").appendChild(tag); | |
} | |
// 当 websocket 接收到服务端发来的消息时,自动会触发这个函数。 | |
socket.onmessage = function (event) { | |
let tag = document.createElement("div"); | |
tag.innerText = event.data; | |
document.getElementById("message").appendChild(tag); | |
} | |
// 服务端主动断开连接时,这个方法也被触发。 | |
socket.onclose = function (event) { | |
let tag = document.createElement("div"); | |
tag.innerText = "[断开连接]"; | |
document.getElementById("message").appendChild(tag); | |
} | |
function sendMessage() { | |
let tag = document.getElementById("txt"); | |
socket.send(tag.value); | |
} | |
function closeConn() { | |
socket.close(); // 向服务端发送断开连接的请求 | |
} | |
</script> | |
</body> | |
</html> |
from channels.generic.websocket import WebsocketConsumer | |
from channels.exceptions import StopConsumer | |
class ChatConsumer(WebsocketConsumer): | |
def websocket_connect(self, message): | |
print("有人来连接了...") | |
# 有客户端来向后端发送 websocket 连接的请求时,自动触发。 | |
# 服务端允许和客户端创建连接(握手)。 | |
self.accept() | |
# 服务端给客户端发送消息 | |
# self.send ("来了呀客官") | |
def websocket_receive(self, message): | |
# 浏览器基于 websocket 向后端发送数据,自动触发接收消息。 | |
text = message['text'] # {'type': 'websocket.receive', 'text': ' 阿斯蒂芬 '} | |
print("接收到消息-->", text) | |
if text == "关闭": | |
# 服务端主动关闭连接,给客户端发送一条断开连接的消息。 | |
self.close() | |
# raise StopConsumer () # 如果服务端断开连接时,执行 StopConsumer 异常,那么 websocket_disconnect 方法不再执行。 | |
return | |
res = "{}SB".format(text) | |
self.send(res) | |
def websocket_disconnect(self, message): | |
print("断开连接了") | |
raise StopConsumer() |
# 小结
基于 django 实现 websocket 请求,但只能对某个人进行处理。
# 群聊(一)
前端代码
<!DOCTYPE html><html lang="en"><head><meta charset="UTF-8"><title>Title</title>
<style>
.message {
height: 300px;
border: 1px solid #dddddd;
width: 100%;
}</style></head><body><div class="message" id="message"></div>
<div><input type="text" placeholder="请输入" id="txt"><input type="button" value="发送" onclick="sendMessage()"><input type="button" value="关闭连接" onclick="closeConn()"></div><script>
socket = new WebSocket("ws://127.0.0.1:8000/room/123/");
// 创建好连接之后自动触发( 服务端执行 self.accept ())socket.onopen = function (event) {
let tag = document.createElement("div");
tag.innerText = "[连接成功]";
document.getElementById("message").appendChild(tag);
}// 当 websocket 接收到服务端发来的消息时,自动会触发这个函数。socket.onmessage = function (event) {
let tag = document.createElement("div");
tag.innerText = event.data;
document.getElementById("message").appendChild(tag);
}// 服务端主动断开连接时,这个方法也被触发。socket.onclose = function (event) {
let tag = document.createElement("div");
tag.innerText = "[断开连接]";
document.getElementById("message").appendChild(tag);
}function sendMessage() {
let tag = document.getElementById("txt");
socket.send(tag.value);
}function closeConn() {
socket.close(); // 向服务端发送断开连接的请求
}</script></body></html>后端
from channels.generic.websocket import WebsocketConsumer
from channels.exceptions import StopConsumer
CONN_LIST = []
class ChatConsumer(WebsocketConsumer):
def websocket_connect(self, message):
print("有人来连接了...")
# 有客户端来向后端发送 websocket 连接的请求时,自动触发。# 服务端允许和客户端创建连接(握手)。self.accept()
CONN_LIST.append(self)
def websocket_receive(self, message):
# 浏览器基于 websocket 向后端发送数据,自动触发接收消息。text = message['text'] # {'type': 'websocket.receive', 'text': ' 阿斯蒂芬 '}
print("接收到消息-->", text)
res = "{}SB".format(text)
for conn in CONN_LIST:
conn.send(res)
def websocket_disconnect(self, message):
CONN_LIST.remove(self)
raise StopConsumer()
# 群聊(二)
基于 channels 中提供 channel layers 来实现。
setting 中配置。
CHANNEL_LAYERS = {
"default": {
"BACKEND": "channels.layers.InMemoryChannelLayer",
}}pip3 install channels-redisCHANNEL_LAYERS = {
"default": {
"BACKEND": "channels_redis.core.RedisChannelLayer",
"CONFIG": {
"hosts": [('10.211.55.25', 6379)]
},
},
}consumers 中特殊的代码。
from channels.generic.websocket import WebsocketConsumer
from channels.exceptions import StopConsumer
from asgiref.sync import async_to_sync
class ChatConsumer(WebsocketConsumer):
def websocket_connect(self, message):
# 接收这个客户端的连接self.accept()
# 获取群号,获取路由匹配中的group = self.scope['url_route']['kwargs'].get("group")
# 将这个客户端的连接对象加入到某个地方(内存 or redis)async_to_sync(self.channel_layer.group_add)(group, self.channel_name)
def websocket_receive(self, message):
group = self.scope['url_route']['kwargs'].get("group")
# 通知组内的所有客户端,执行 xx_oo 方法,在此方法中自己可以去定义任意的功能。async_to_sync(self.channel_layer.group_send)(group, {"type": "xx.oo", 'message': message})
def xx_oo(self, event):
text = event['message']['text']
self.send(text)
def websocket_disconnect(self, message):
group = self.scope['url_route']['kwargs'].get("group")
async_to_sync(self.channel_layer.group_discard)(group, self.channel_name)
raise StopConsumer()
# 总结
- websocket 是什么?协议。
- django 中实现 websocket,channels 组件。
- 单独连接和收发数据。
- 手动创建列表 & channel layers。
提醒:
- 运维 & 运维开发的同学,代码发布系统项目。(django 1.11.7 讲)
- 工单系统
# 工单系统
# 前端 gojs
<!DOCTYPE html> | |
<html lang="en"> | |
<head> | |
<meta charset="UTF-8"> | |
<title>Title</title> | |
</head> | |
<body> | |
<div id="myDiagramDiv" style="width:500px; height:350px; background-color: #DAE4E4;"></div> | |
<script src="gojs/go.js"></script> | |
<script> | |
var $ = go.GraphObject.make; | |
// 第一步:创建图表 | |
var myDiagram = $(go.Diagram, "myDiagramDiv"); // 创建图表,用于在页面上画图 | |
// 第二步:创建一个节点,内容为武沛齐 | |
// $(go.TextBlock, {text: "武沛齐"}) 创建文本 | |
var node = $(go.Node, $(go.TextBlock, {text: "武沛齐"})); | |
// 第三步:将节点添加到图表中 | |
myDiagram.add(node); | |
</script> | |
</body> | |
</html> |
<!DOCTYPE html> | |
<html lang="en"> | |
<head> | |
<meta charset="UTF-8"> | |
<title>Title</title> | |
</head> | |
<body> | |
<div id="myDiagramDiv" style="width:500px; height:350px; background-color: #DAE4E4;"></div> | |
<script src="gojs/go.js"></script> | |
<script> | |
var $ = go.GraphObject.make; | |
// 第一步:创建图表 | |
var myDiagram = $(go.Diagram, "myDiagramDiv"); // 创建图表,用于在页面上画图 | |
var node1 = $(go.Node, $(go.TextBlock, {text: "武沛齐"})); | |
myDiagram.add(node1); | |
var node2 = $(go.Node, $(go.TextBlock, {text: "武沛齐", stroke: 'red'})); | |
myDiagram.add(node2); | |
var node3 = $(go.Node, $(go.TextBlock, {text: "武沛齐", background: 'lightblue'})); | |
myDiagram.add(node3); | |
</script> | |
</body> | |
</html> |
<!DOCTYPE html> | |
<html lang="en"> | |
<head> | |
<meta charset="UTF-8"> | |
<title>Title</title> | |
</head> | |
<body> | |
<div id="myDiagramDiv" style="width:500px; height:350px; background-color: #DAE4E4;"></div> | |
<script src="gojs/go.js"></script> | |
<script src="gojs/Figures.js"></script> | |
<script> | |
var $ = go.GraphObject.make; | |
var myDiagram = $(go.Diagram, "myDiagramDiv"); // 创建图表,用于在页面上画图 | |
var node1 = $(go.Node, | |
$(go.Shape, {figure: "Ellipse", width: 40, height: 40}) | |
); | |
myDiagram.add(node1); | |
var node2 = $(go.Node, | |
$(go.Shape, {figure: "RoundedRectangle", width: 40, height: 40, fill: 'green',stroke:'red'}) | |
); | |
myDiagram.add(node2); | |
var node3 = $(go.Node, | |
$(go.Shape, {figure: "Rectangle", width: 40, height: 40, fill: null}) | |
); | |
myDiagram.add(node3); | |
var node4 = $(go.Node, | |
$(go.Shape, {figure: "Diamond", width: 40, height: 40, fill: '#ddd'}) | |
); | |
myDiagram.add(node4); | |
// 需要引入 Figures.js | |
var node5 = $(go.Node, | |
$(go.Shape, {figure: "Club", width: 40, height: 40, fill: 'red'}) | |
); | |
myDiagram.add(node5); | |
</script> | |
</body> | |
</html> |
<!DOCTYPE html> | |
<html lang="en"> | |
<head> | |
<meta charset="UTF-8"> | |
<title>Title</title> | |
</head> | |
<body> | |
<div id="myDiagramDiv" style="width:500px; height:350px; background-color: #DAE4E4;"></div> | |
<script src="gojs/go.js"></script> | |
<script src="gojs/Figures.js"></script> | |
<script> | |
var $ = go.GraphObject.make; | |
var myDiagram = $(go.Diagram, "myDiagramDiv"); // 创建图表,用于在页面上画图 | |
var node1 = $(go.Node, | |
"Vertical", | |
{ | |
background: 'yellow', | |
padding: 8 | |
}, | |
$(go.Shape, {figure: "Ellipse", width: 40, height: 40}), | |
$(go.TextBlock, {text: "武沛齐"}) | |
); | |
myDiagram.add(node1); | |
var node2 = $(go.Node, | |
"Horizontal", | |
{ | |
background: 'white', | |
padding: 5 | |
}, | |
$(go.Shape, {figure: "RoundedRectangle", width: 40, height: 40}), | |
$(go.TextBlock, {text: "武沛齐"}) | |
); | |
myDiagram.add(node2); | |
var node3 = $(go.Node, | |
"Auto", | |
$(go.Shape, {figure: "Ellipse", width: 80, height: 80, background: 'green', fill: 'red'}), | |
$(go.TextBlock, {text: "武沛齐"}) | |
); | |
myDiagram.add(node3); | |
</script> | |
</body> | |
</html> |
<!DOCTYPE html> | |
<html lang="en"> | |
<head> | |
<meta charset="UTF-8"> | |
<title>Title</title> | |
</head> | |
<body> | |
<div id="myDiagramDiv" style="width:800px; min-height:450px; background-color: #DAE4E4;"></div> | |
<script src="gojs/go-debug.js"></script> | |
<script> | |
var $ = go.GraphObject.make; | |
var myDiagram = $(go.Diagram, "myDiagramDiv", | |
{layout: $(go.TreeLayout, {angle: 0})} | |
); // 创建图表,用于在页面上画图 | |
var startNode = $(go.Node, "Auto", | |
$(go.Shape, {figure: "Ellipse", width: 40, height: 40, fill: '#79C900', stroke: '#79C900'}), | |
$(go.TextBlock, {text: '开始', stroke: 'white'}) | |
); | |
myDiagram.add(startNode); | |
var downloadNode = $(go.Node, "Auto", | |
$(go.Shape, {figure: "RoundedRectangle", height: 40, fill: '#79C900', stroke: '#79C900'}), | |
$(go.TextBlock, {text: '下载代码', stroke: 'white'}) | |
); | |
myDiagram.add(downloadNode); | |
var startToDownloadLink = $(go.Link, | |
{fromNode: startNode, toNode: downloadNode}, | |
$(go.Shape, {strokeWidth: 1}), | |
$(go.Shape, {toArrow: "OpenTriangle", fill: null, strokeWidth: 1}) | |
); | |
myDiagram.add(startToDownloadLink); | |
var zipNode = $(go.Node, "Auto", | |
$(go.Shape, {figure: "RoundedRectangle", height: 40, fill: '#79C900', stroke: '#79C900'}), | |
$(go.TextBlock, {text: '本地打包', stroke: 'white'}) | |
); | |
myDiagram.add(zipNode); | |
var downloadToZipLink = $(go.Link, | |
{fromNode: downloadNode, toNode: zipNode}, | |
$(go.Shape, {strokeWidth: 1}), | |
$(go.Shape, {toArrow: "OpenTriangle", fill: null, strokeWidth: 1}) | |
); | |
myDiagram.add(downloadToZipLink); | |
for (var i = 1; i < 6; i++) { | |
var node = $(go.Node, "Auto", | |
$(go.Shape, {figure: "RoundedRectangle", height: 40, fill: 'lightgray', stroke: 'lightgray'}), | |
$(go.TextBlock, {text: '服务器' + i, stroke: 'white', margin: 5}) | |
); | |
myDiagram.add(node); | |
var nodeToZipLink = $(go.Link, | |
{fromNode: zipNode, toNode: node, routing: go.Link.Orthogonal}, | |
$(go.Shape, {strokeWidth: 1, stroke: 'lightgray'}), | |
$(go.Shape, {toArrow: "OpenTriangle", fill: null, strokeWidth: 1, stroke: 'lightgray'}) | |
); | |
myDiagram.add(nodeToZipLink); | |
} | |
</script> | |
</body> | |
</html> |
<!DOCTYPE html> | |
<html lang="en"> | |
<head> | |
<meta charset="UTF-8"> | |
<title>Title</title> | |
</head> | |
<body> | |
<div id="diagramDiv" style="width:100%; min-height:450px; background-color: #DAE4E4;"></div> | |
<script src="gojs/go-no-logo.js"></script> | |
<script> | |
var $ = go.GraphObject.make; | |
var diagram = $(go.Diagram, "diagramDiv", { | |
layout: $(go.TreeLayout, { | |
angle: 0, | |
nodeSpacing: 20, | |
layerSpacing: 70 | |
}) | |
}); | |
// 节点的模板 | |
diagram.nodeTemplate = $(go.Node, "Auto", | |
$(go.Shape, { | |
figure: "RoundedRectangle", | |
fill: 'lightgray', | |
stroke: 'lightgray' | |
}, new go.Binding("figure", "figure"), new go.Binding("fill", "color"), new go.Binding("stroke", "color")), | |
$(go.TextBlock, {margin: 8}, new go.Binding("text", "text")) | |
); | |
// 连接的模板 | |
diagram.linkTemplate = $(go.Link, | |
{routing: go.Link.Orthogonal}, | |
$(go.Shape, {stroke: 'lightgray'}, new go.Binding('stroke', 'link_color')), | |
$(go.Shape, {toArrow: "OpenTriangle", stroke: 'lightgray'}, new go.Binding('stroke', 'link_color')), | |
$(go.TextBlock, {font: '8pt serif', segmentOffset: new go.Point(0, -10)}, new go.Binding("text", "link_text")) | |
); | |
var nodeDataArray = [ | |
{key: "start", text: '开始', figure: 'Ellipse', color: "lightgreen"}, | |
{key: "download", parent: 'start', text: '下载代码', color: "lightgreen", link_text: '执行中...'}, | |
{key: "compile", parent: 'download', text: '本地编译', color: "lightgreen"}, | |
{key: "zip", parent: 'compile', text: '打包', color: "red", link_color: 'red'}, | |
{key: "c1", text: '服务器1', parent: "zip"}, | |
{key: "c11", text: '服务重启', parent: "c1",color: "lightgrey"}, | |
{key: "c2", text: '服务器2', parent: "zip"}, | |
{key: "c21", text: '服务重启', parent: "c2"}, | |
{key: "c3", text: '服务器3', parent: "zip"}, | |
{key: "c31", text: '服务重启', parent: "c3"}, | |
]; | |
diagram.model = new go.TreeModel(nodeDataArray); | |
/* | |
diagram.model.addNodeData ({key: "c4", text: ' 服务器 3', parent: "c3", color: "lightgreen"}) | |
var c1 = diagram.model.findNodeDataForKey ("c1"); | |
diagram.model.setDataProperty (c1, "color", "red"); | |
diagram.model.setDataProperty (c1, "link_text", "执行中..."); | |
diagram.model.setDataProperty (c1, "link_color", "red"); | |
*/ | |
</script> | |
</body> | |
</html> |
<!DOCTYPE html> | |
<html lang="en"> | |
<head> | |
<meta charset="UTF-8"> | |
<title>Title</title> | |
</head> | |
<body> | |
<div id="diagramDiv" style="width:100%; min-height:450px; background-color: #DAE4E4;"></div> | |
<script src="gojs/go-no-logo.js"></script> | |
<script> | |
var $ = go.GraphObject.make; | |
var diagram = $(go.Diagram, "diagramDiv", { | |
layout: $(go.TreeLayout, { | |
angle: 0, | |
nodeSpacing: 20, | |
layerSpacing: 70 | |
}) | |
}); | |
// 节点 | |
var nodeDataArray = [ | |
{key: "Alpha"}, | |
{key: "Beta"}, | |
{key: "papa"}, | |
{key: "bilibili"} | |
]; | |
// 关系 | |
var linkDataArray = [ | |
{from: "Alpha", to: "Beta"}, | |
{from: "Alpha", to: "papa"}, | |
{from: "Beta", to: "bilibili"}, | |
{from: "papa", to: "bilibili"}, | |
]; | |
diagram.model = new go.GraphLinksModel(nodeDataArray, linkDataArray); | |
diagram.model.addNodeData({key: "c4", text: '服务器3', color: "lightgreen"}) | |
diagram.model.addLinkData({from: "bilibili", to: 'c4'}) | |
</script> | |
</body> | |
</html> |
# 后端 django + websocket
- 表结构
- websocket+gojs
- 流程图标 + go.js
- 同意 or 不同意
# 总结
- websocket 原理
- websocket 实现的功能(django 中 channels 的应用)
- gojs
class A(models.Model): | |
title = ... | |
class B(models.Model): | |
name = ... | |
a1 = models.ForeignKey(to=A,related_name='x') | |
obj = modes.B.objects.filter(id=1).first() | |
obj.a1.title | |
abj = models.A.objects.filter(id=2).first() | |
abj.x.all() |